- Products
- Hardware FL (Revo/Revo-A)
- Hardware Dyna (Revo/Revo-A, Revo-ARC)
- Dyna Stud Kit (Revo/ Revo-A, Revo-ARC 99-05)
- Hardware Sportster (Revo/Revo-A, Revo-ARC)
- Hardware Trike (Revo/Revo-A)
- Hardware FXR (Revo/Revo-A)
- Hardware FXR (Revo-ARC)
- Hardware FL (Revo-ARC 14+)
- Hardware FL (Revo-ARC 09-13)
- Hardware FL (Revo-ARC 99-08)
- Compressor Assembly, FL/Trike
- Compressor Assembly, Softail (2018+)
- Compressor Assembly, Softail (2000-2017)
- Compressor Assembly, Softail (1989-1999)
- Compressor Assembly, Dyna
- Compressor Assembly, Vrod
- Replacement Compressor- FL/Trike
- Replacement Compressor- Softail/Dyna/Vrod
- Solenoid Release Valve
- Compressor Bracket- FL/Trike
- Compressor Bracket- Softail (2018+)
- Compressor Bracket- Softail (2000-2017)
- Compressor Bracket- Softail (1989-1999)
- Compressor Bracket- Dyna
- Compressor Bracket- Vrod
- Tru North Air Compressor Head
- Thomas Air Compressor Head
- Handlebar Control, Black
- Handlebar Control, Chrome
- Handlebar Control, Black 2015+ Roadglide
- Handlebar Control, Chrome 2015+ Roadglide
- Handlebar Control, Black for Skyline OS
- Toggle Switch
- Handlebar Control Wiring Extension
- Handlebar Control Wiring Crossover
- Electrical Wiring Harness
- Replacement Relay for Wiring Harness
- Cover Pushbutton
- Toggle Switch Boot
REVO/REVO-A/REVO-ARC MOUNTING HARDWARE
COMPRESSORS/RELEASE VALVE/BRACKETS/PARTS
HANDLEBAR CONTROLS/WIRING PARTS
- UTV
- APPAREL
- Explore
- SUPPORT
Fitment: 1991-2017 HARLEY-DAVIDSON DYNA MODELS
NOTE: The following H-D OEM part numbers are required for installation on 1991-2005 models. 6792 (Washer) Qty. 2 7880 (Nut) Qty. 2 6113 (Washer) Qty. 2 8185 (Acorn Nut) Qty. 2 54666-08 (Stud) Qty. 2


INSTALL INSTRUCTIONS

STEP ONE: INSTALL SHOCKS
- With motorcycle properly supported on jack, remove the stock shocks.
- Apply blue threadlocker to the hardware and install fasteners and shocks in accordance to FIGURE A,B, or C, depending on the year of motorcycle. If installing REVO-A install with adjuster knob facing the rear of the motorcycle.
- Torque hardware to OE specifications.
WARNING:
Before purchasing or attempting to install shocks that are different than the OEM length, confirm that the wheel travel can be altered without causing clearance issues, such as swing-arm/axle to exhaust contact as well as chain/belt guard and tire clearance.
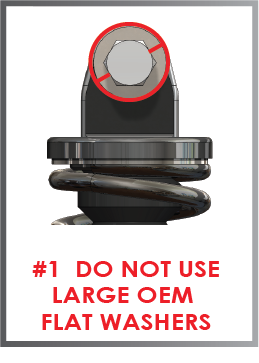
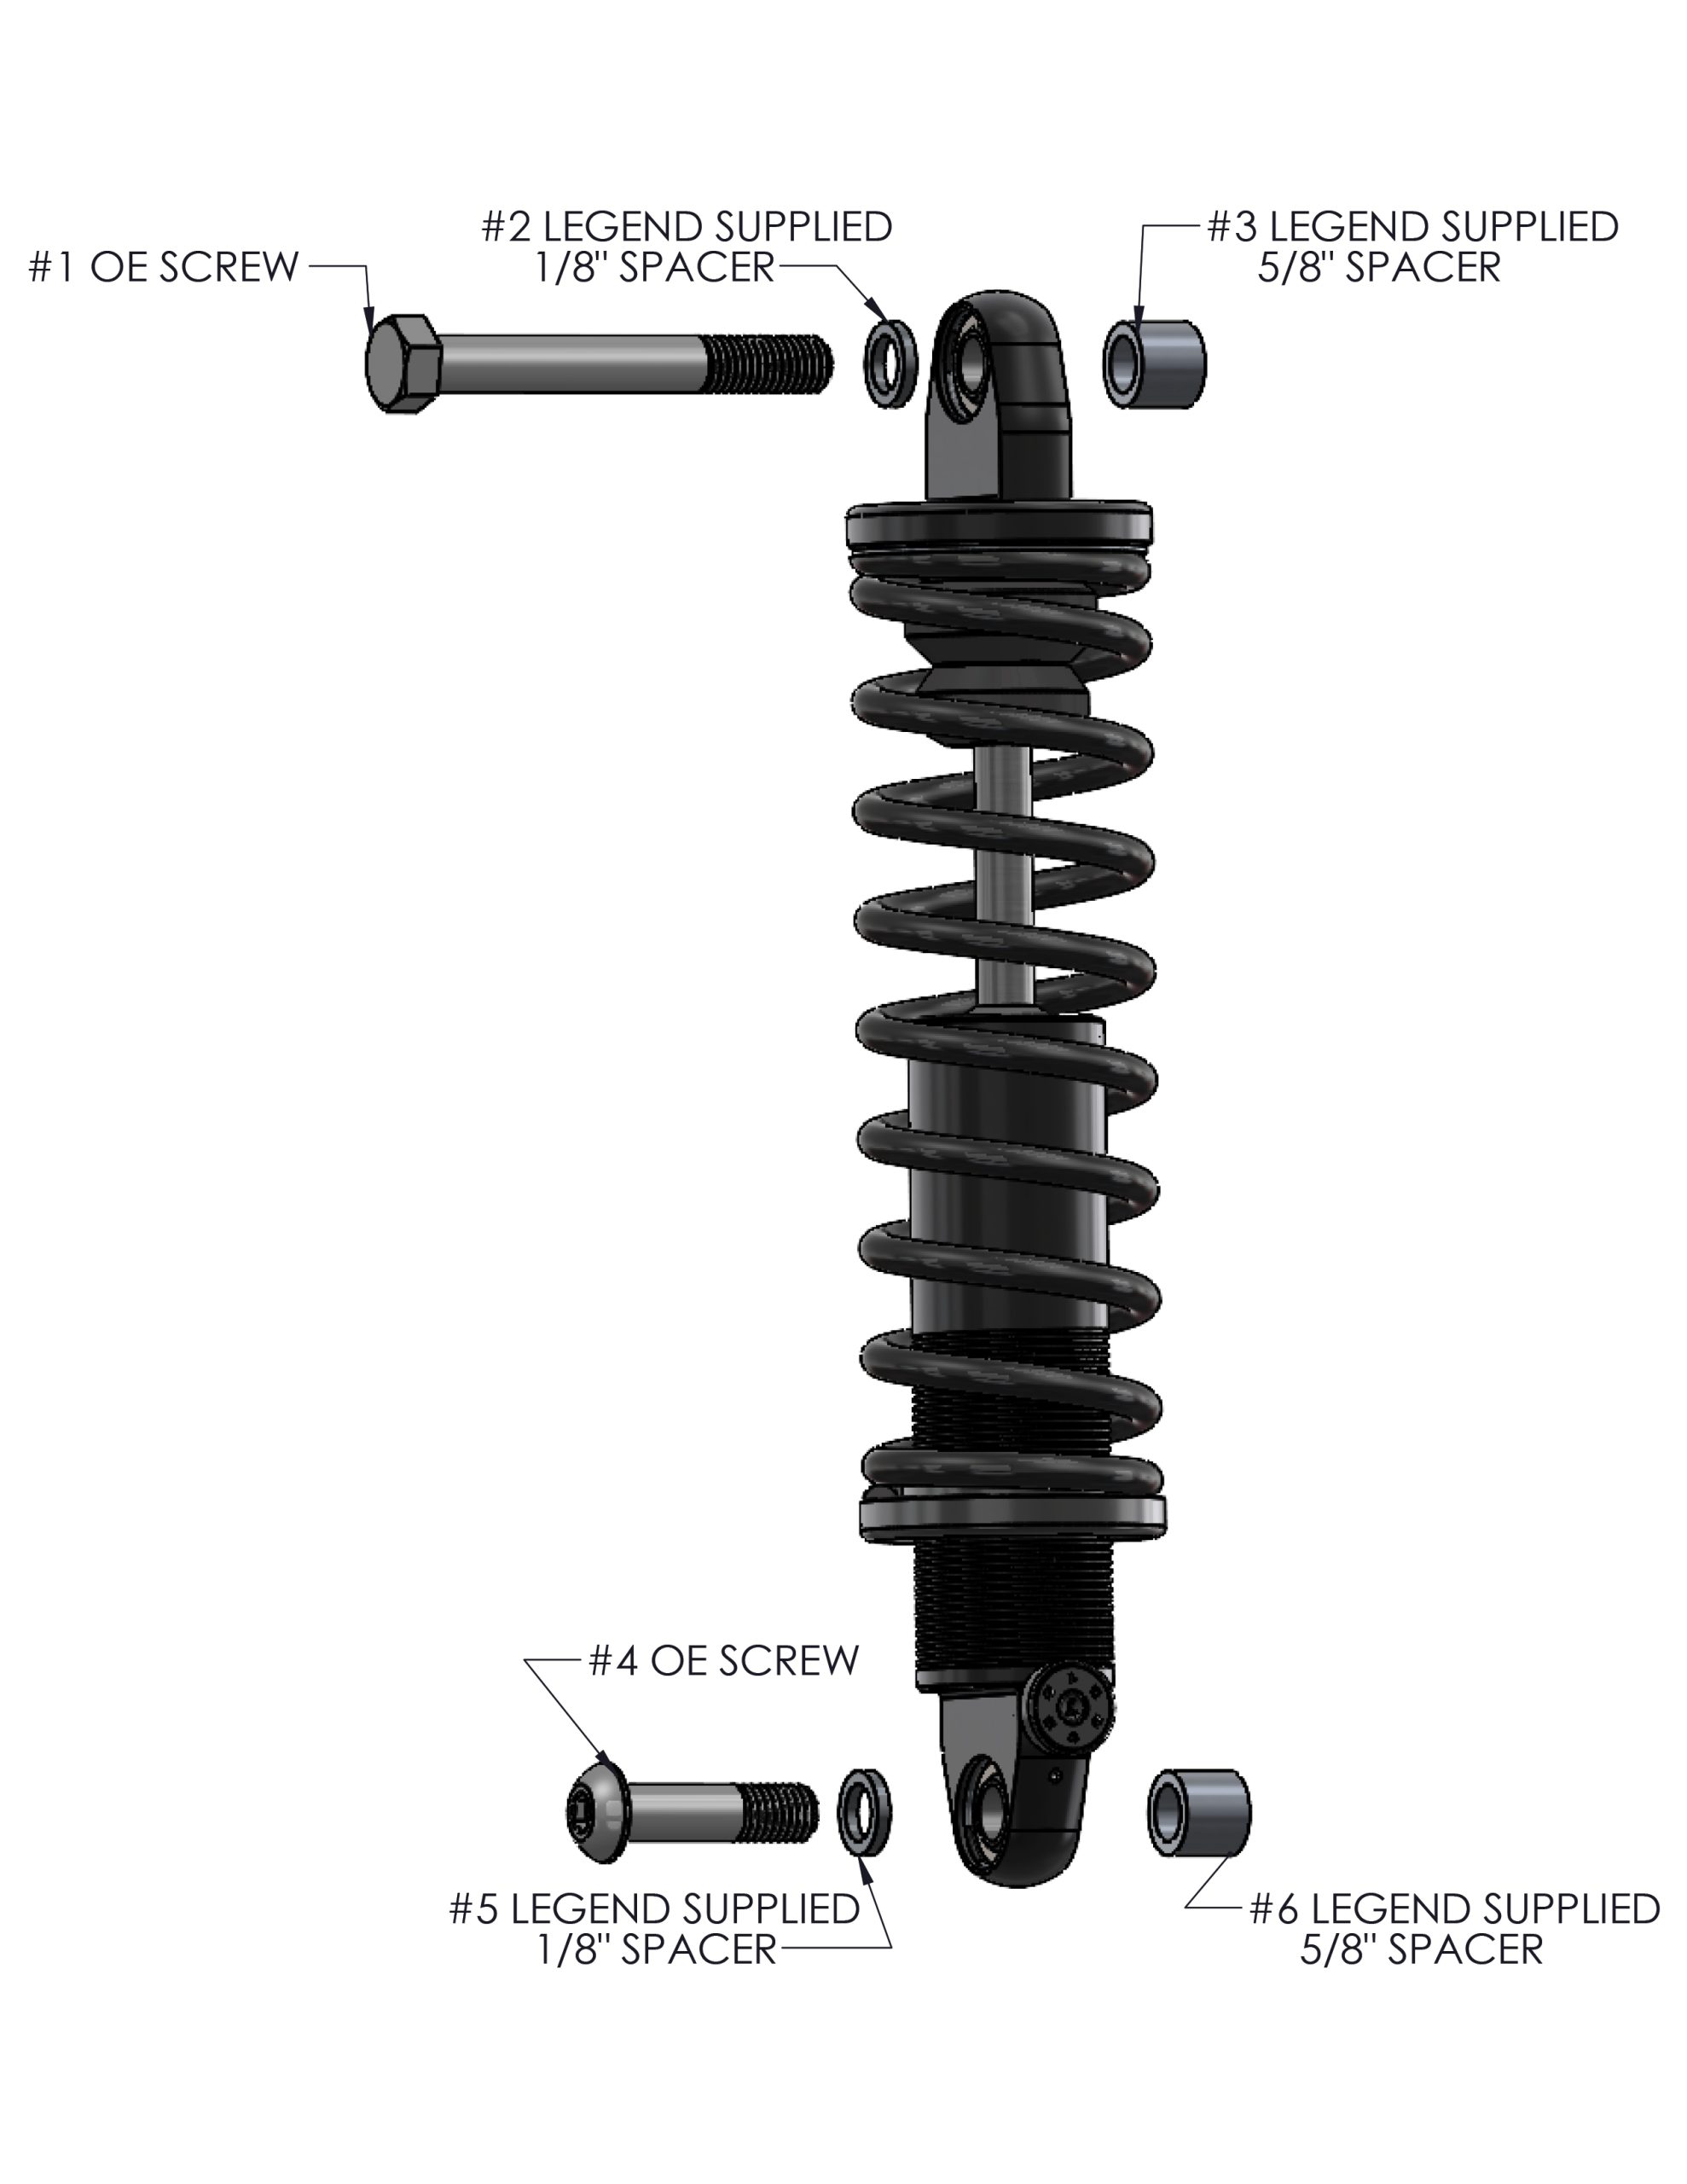
- DO NOT USE LARGE OEM FLAT WASHERS
91-05 DYNA MODELS

- HD OE Part #8185 purchase separately
- HD OE Part #6113 purchase separately
- Legend Supplied 1/8″ spacer
- Legend Supplied 5/8″ spacer
- HD OE Part #6792 purchase separately
- HD OE Part #54666-08 purchase separately
- HD OE Part #7880 purhase separately
- OE Bolt
- Legend Supplied 1/8″ spacer
- Legend Supplied 5/8″ spacer
2006-2007 DYNA MODELS
- Legend Supplied 1/2-13 x 4″ Bolt
- Legend Supplied 5/8″ Spacer
- OE Screw
- Legend Supplied 1/8″ Spacer
- Legend Supplied 5/8″ Spacer
2008-2017 DYNA MODELS

- OE Nut
- OE Washer
- Legend Supplied 1/8″ Spacer
- Legend Supplied 5/8″ Spacer
- OE Stud
- OE Screw
- Legend Supplied 1/8″ Spacer
- Legend Supplied 5/8″ Spacer

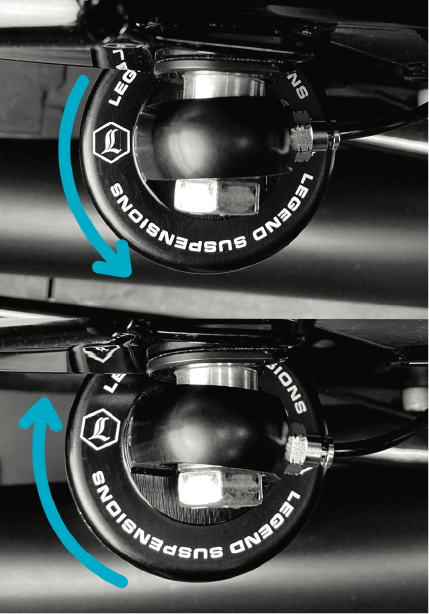
STEP TWO: CHECK FOR PROPER MOUNTING
Once shocks are installed with the proper hardware FIGURE A, B, or C, (depending on the year of motorcycle) make sure you can rotate them freely in both directions FIGURE D.
IF SHOCKS DO NOT ROTATE FREELY, CHECK THAT THE HARDWARE IS INSTALLED CORRECTLY.
WARNING: If mounting Legend shocks with aftermarket frame sliders, please refer to the included supplemental install guide.
SET UP INSTRUCTIONS
STEP ONE: SET SAG
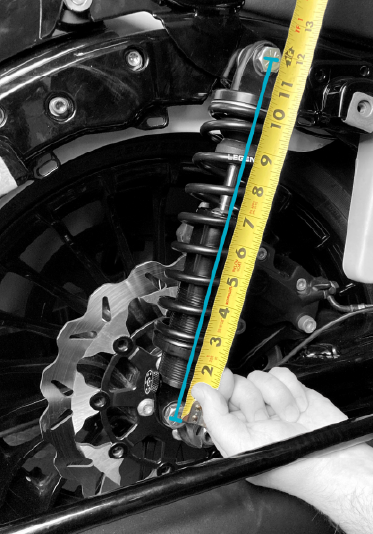
- Verify springs on each shock are adjusted evenly (same
number of threads exposed below the spring) FIGURE E. - Sit rider (with gear on), passenger, and the load you intend on carrying, on the motorcycle.
- Measure the shock length from the center of the lower
mounting bolt to the center of the upper mounting bolt
FIGURE E. - Refer to the table below to determine the proper sag
measurement based on the shock length purchased:
| Shock Length | Proper Sag Measurement |
|---|---|
| 12" | 11.5" |
| 13" | 12" |
| 14" | 13" |
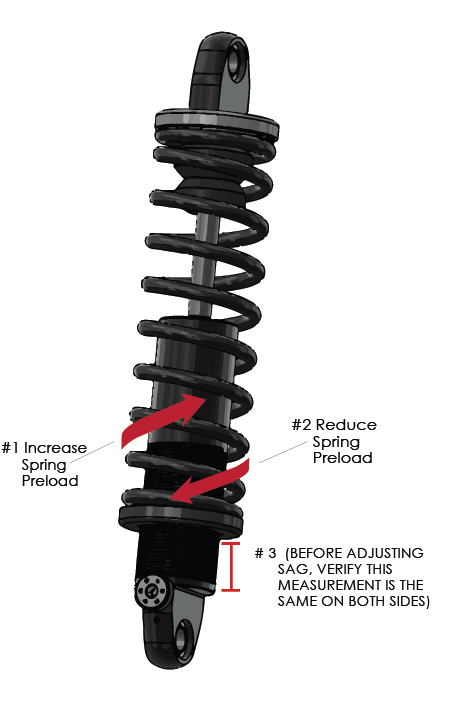
- If the measured length is less than the proper sag measurement, increase spring preload by threading spring UP the shock body to tighten spring (LESS SAG) FIGURE F.
- If the measured length is greater than the proper sag measurement, decrease spring preload by threading spring DOWN the shock body to tighten spring (MORE SAG) FIGURE F.
- Make equal adjustments to left and right shocks.
STEP TWO: REBOUND DAMPING (APPLICABLE TO REVO-A)
- Rebound damping controls the speed at which the shock absorber extends after being compressed.
- If you feel the suspension has a mushy or oscillating feel to it, increase the rebound damping to a higher number. If the suspension feels slow reacting or feels firm on closly spaced bumps, decrease the rebound damping to lower number.
- Turn rebound adjuster to the same number on the left and right shocks, firmer or softer depending on preference and test ride again.
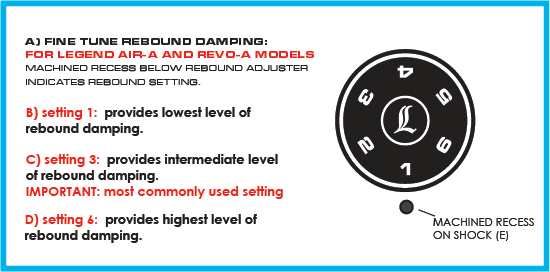
- Fine tune rebound damping: For Legend Air-A and Revo-A models. Machined recess below rebound adjuster indicates rebound setting.
- Setting 1: provides lowest level of rebound damping.
- Setting 3: provides intermediate level of rebound damping. IMPORTANT: most commonly used setting
- Setting 6: provides highest level of rebound damping.
- Machined recess on shock
USE WITH AFTERMARKET FRAME SLIDERS
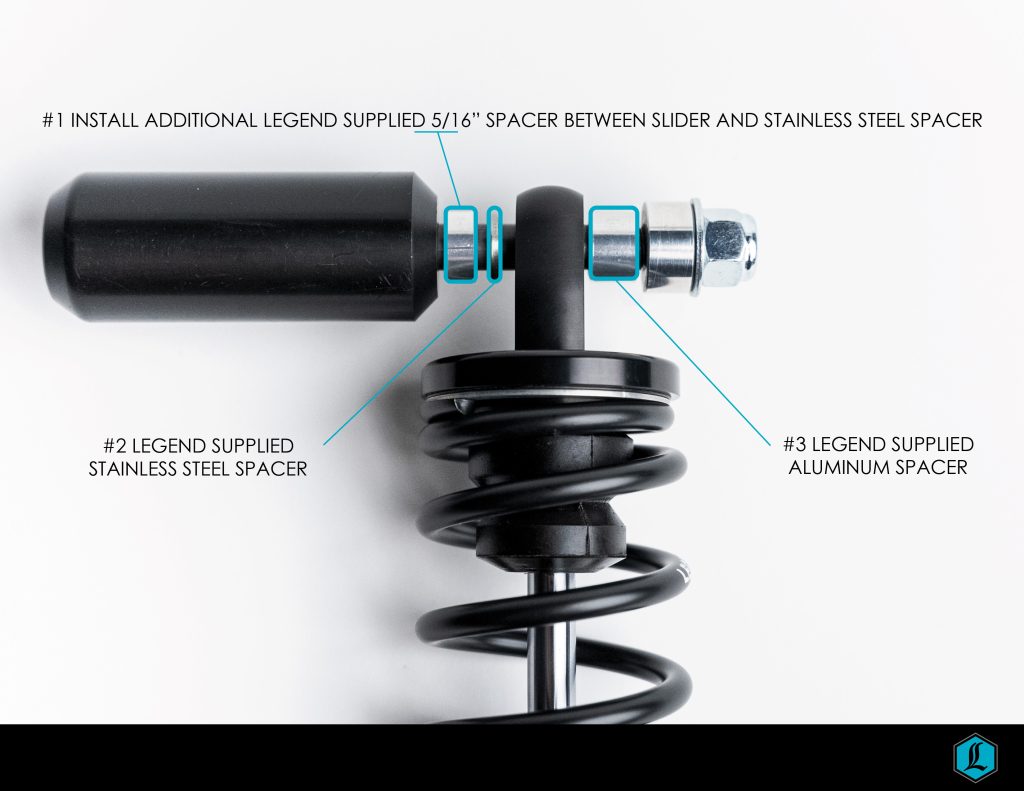
- Install additional Legend supplied 5/16″ spacer between slider and stainless steel spacer
- Legend supplied stainless steel spacer
- Legend supplied aluminum spacer